
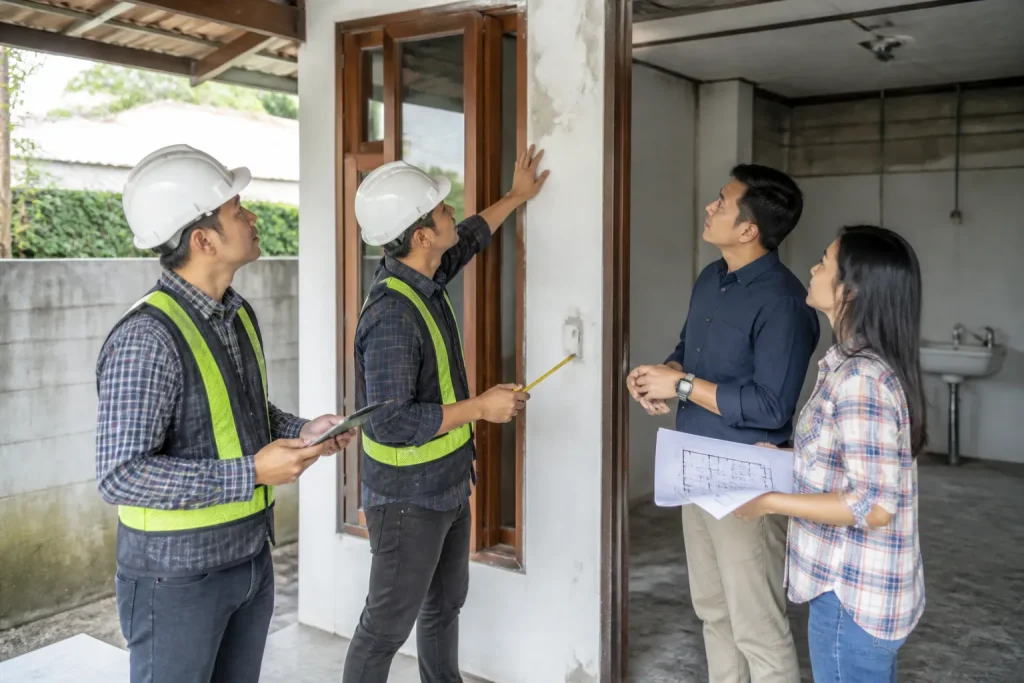
A controlled house renovation starts with an assessment of the existing condition, not with demolition. A pre-renovation checklist helps the owner understand the required work, identify hidden risks, set priorities, and prepare an estimate based on a clearer scope. Early inspection also reduces the likelihood of variations, delays, damage to retained elements, and disputes with the contractor.
Use this guide before requesting quotations or setting a start date. Record findings with photographs, measurements, locations, inspection dates, and urgency levels. For structural alterations, additional floors, or serious visible damage, involve a suitably competent professional. If the renovation affects water supply, drainage, or sanitary fixtures, also use the Checklist Audit Plumbing & Sanitasi Rumah. For a plan to add another floor, supplement the review with Audit Struktur Rumah Sebelum Tambah Lantai.
How to use this checklist
- Define the renovation objective, affected rooms, and intended outcome.
- Inspect the house under observable conditions, including during rain if there are signs of water ingress.
- Document the pre-work condition with photographs, video, sketches, and key measurements.
- Classify findings as mandatory repairs, items requiring controls, or items that can be deferred.
- Confirm the scope, work method, responsibilities, acceptance criteria, and sequence of work in writing.
1. Define the renovation objective and boundaries
Objectives, functions, and priorities
- State the reason for the renovation, such as repairing damage, improving function, upgrading services, or changing the layout.
- List the rooms and elements included and excluded from the work. Clear boundaries help prevent unplanned additional work.
- Record the occupants’ needs, including room numbers, accessibility, ventilation, storage, privacy, and ease of maintenance.
- Rank requirements as mandatory, important, or optional. Priorities should reflect safety, function, defects, and life-cycle considerations, not appearance alone.
Information to collect
- Site area, building area, number of floors, approximate construction date, and renovation history.
- Available plans, elevations, sections, structural drawings, and service drawings.
- Information about previous alterations, materials used, and known pipe and cable routes.
- Records of leaks, cracks, ponding, electrical faults, water pressure problems, and previous repairs.
Control: Do not rely solely on old photographs or drawings. Measure and reconcile the current condition because a house may have changed after earlier alterations.
2. Inspect the structure and building envelope
Structural elements
Observe visible foundations, ground beams, columns, beams, floor slabs, structural walls, roof framing, and primary connections. Look for cracking, deflection, changes in level, exposed corroded reinforcement, spalled concrete, decayed timber, or loose connections. Distinguish cracks in finishes from indications that may affect a structural element.
- Map the location, direction, length, and visible width of cracks; use photographs with a simple scale reference.
- Check whether doors or windows are difficult to close, floors feel uneven, or new gaps have appeared between walls and frames.
- Look for signs of movement, such as diagonal cracks at opening corners or cracks continuing from a wall into another element.
- Do not chase, cut, or drill columns, beams, slabs, or structural walls until reinforcement and service routes have been confirmed.
If the renovation adds load, changes openings, removes walls, or adds a floor, a more detailed structural assessment is required. The relevant information may include member dimensions, material properties where verifiable, soil or foundation conditions, and design loads. Do not assume that every masonry wall is non-structural or that a floor that feels strong can safely carry additional load.
Roof, gutters, external walls, and openings
- Inspect roof coverings for broken or displaced units, biological growth, open joints, and defective junction details.
- Check gutters, rainwater downpipes, flashings, parapets, and roof-to-wall intersections.
- Identify damp stains, blistering paint, mould, efflorescence, or damaged plaster on both internal and external faces.
- Inspect frames, glazing, sealants, sills, and vents to prevent rainwater entering the house.
Initial acceptance criterion: No active water source should be concealed beneath new finishes. The cause of water ingress must be traced and the repair tested before painting, installing ceilings, or closing walls.
3. Review room dimensions, layout, and finishes
Measurements and layout coordination
- Measure room length, width, height, relevant wall thicknesses, opening sizes, floor levels, and the position of columns or beams.
- Compare actual dimensions with the requirements for furniture, equipment, circulation, and maintenance access.
- Confirm that door swings do not obstruct escape routes, work areas, or access to service equipment.
- Coordinate ceilings, lighting, ductwork, pipes, cabinets, doors, and windows before approving the layout.
Floors, walls, ceilings, and joinery
- Check levelness, falls, hollow-sounding areas, loose tiles, failed grout, and areas that may retain moisture.
- Inspect walls for cracks, unevenness, peeling paint, mould, and previous water damage.
- Inspect ceilings for water stains, sagging, open joints, and the absence of inspection access.
- Check cabinets, frames, stairs, railings, and joinery for termites, decay, corrosion, or unstable connections.
Decide whether each element will be retained, repaired, relocated, or demolished. This decision affects quantities, protection requirements, work sequence, and waste disposal.
4. Check plumbing, sanitation, and drainage
Domestic water supply
- Identify the water source, tank, pump, meter, main shut-off valve, pipe routes, and points of use.
- Check joints for leakage, water pressure during peak use, pipe noise, and the condition of tanks and their supports.
- Confirm that isolation valves can be located and operated before work begins.
- Record identifiable pipe materials and diameters, particularly in areas that will be demolished or relocated.
Sanitary drainage and rainwater
- Inspect toilets, floor drains, washbasins, showers, grease traps where applicable, inspection chambers, septic tanks, and discharge routes.
- Look for odours, slow drainage, gurgling, ponding, backflow, or damp marks around bathrooms.
- Confirm that wet-area floors fall toward drains and that waterproofing is sound before finishes are reinstated.
- Check rainwater drainage capacity and condition, especially if the roof area or other impermeable surfaces will increase.
Acceptance criterion: After repair or installation, water services must be isolatable, joints must show no leakage during testing, drainage must flow without unintended ponding, and service points must remain accessible for maintenance. Test before pipes or wet areas are enclosed by walls, screeds, or finishes.
5. Check electrical, mechanical, and ventilation systems
- Identify the distribution board, circuit breakers, earthing arrangements, cable routes, light points, socket outlets, and high-load equipment.
- Look for overheating, burning smells, damaged insulation, loose outlets, unlabelled boards, and overloaded extension connections.
- Confirm that the loads of new appliances have been assessed and that circuit capacity is not assumed without verification.
- Inspect natural ventilation, exhaust fans, air paths, and service clearances for air-conditioning or water-heating equipment.
- Coordinate cables, pipes, ductwork, ceiling framing, and structure so that they do not conflict.
Electrical inspection and work must be performed by competent personnel. Isolate the supply before work, but do not assume a circuit is safe without verification. Keep access to panels, valves, cleanouts, filters, and equipment requiring maintenance.
6. Check approvals, neighbours, and site access
- Review ownership documents, building drawings, local requirements, and any approvals or permits applicable to the work.
- Confirm that the proposal does not breach property boundaries, setbacks, shared areas, access rights, or local building requirements.
- Notify occupants, neighbours, building management, and other affected parties about the planned work.
- Assess delivery routes, unloading areas, material storage, waste removal, and protection of roads or shared spaces.
- Set working hours and controls for dust and noise, and secure the site for children, older people, pets, and occupants who remain in the house.
Administrative requirements vary by location and by the type of work. Confirm them with the relevant authority or building manager before demolition, not after work has started.
7. Establish quantities, budget, and scope
Basis of measurement
Prepare an initial quantity take-off from actual measurements. Examples include floor areas for demolition and replacement finishes, wall areas for painting, skirting lengths, numbers of light points, sanitary fixtures, pipe lengths, and the volume of waste to be removed. State units clearly and separate measured quantities from assumptions.
| Work group | Information to record | Control before tendering |
|---|---|---|
| Demolition | Location, area or quantity, material, and protection required | Mark retained elements and approve the demolition method |
| Structure | Member, dimensions, connection details, and temporary support requirements | Obtain specialist verification before cutting or applying additional load |
| Architecture | Floor, wall, ceiling, opening areas, and finish specifications | Use samples or mock-ups and agree the relevant tolerances |
| Plumbing and sanitation | Pipe lengths, diameters, fittings, fixtures, valves, drains, and access points | Test leakage and flow before closing the work |
| Electrical and mechanical | Boards, circuits, points, cables, equipment, ventilation, and service access | Coordinate load, routes, testing, and labelling |
Budget and variations
- Separate work, materials, delivery, waste disposal, protection, testing, temporary works, and cleaning.
- Record assumptions that cannot yet be verified, such as concealed wall conditions or foundation depth.
- Establish a variation approval process. Each variation should state the reason, quantity, time effect, and cost effect before it is carried out.
- Do not select a quotation on price alone. Compare scope, specifications, exclusions, method, duration, and each party’s responsibilities.
8. Assign roles and responsibilities
| Party | Primary responsibility |
|---|---|
| Homeowner | Set the objectives, provide information, approve scope, budget, variations, and access arrangements. |
| Designer or consultant | Verify existing conditions, develop drawings and specifications, coordinate disciplines, and explain acceptance criteria. |
| Contractor | Review site conditions, prepare the work method, protect existing areas, control quality and safety, and document the work. |
| Structural or services specialist | Assess and design specialist work and verify relevant test results. |
| Occupants | Follow access restrictions, report unsafe conditions, and do not remove protection without permission. |
9. Prepare safety and quality controls
Safety before starting
- Identify hazards from demolition, falling materials, dust, noise, sharp objects, hazardous substances, electricity, water, fire, and work at height.
- Isolate affected services and verify that energy sources are safe before demolition.
- Use barriers, signs, lighting, ventilation, suitable personal protective equipment, and clear escape routes.
- Do not remove any potentially load-bearing element without an agreed sequence and reviewed temporary support.
- Store materials and debris so that slabs are not overloaded and stairs, doors, and escape routes remain clear.
Quality control and records
- Use the latest drawing revision and mark field changes clearly.
- Inspect concealed work before it is covered, including reinforcement, waterproofing, pipes, cables, insulation, and framing.
- Record test results, photographs before closing-up, product or material references where necessary, and service routes.
- Maintain a defects or outstanding-work list with an owner and due date for every action.
Practical pre-renovation checklist
| Inspection item | Status | Evidence or action |
|---|---|---|
| Objective, scope, and priorities are defined | Not started / Partial / Complete | Needs list and concept drawings |
| Actual dimensions and existing conditions are documented | Not started / Partial / Complete | Measured plan, photographs, and video |
| Structure is reviewed for cracks, deflection, and load changes | Not started / Partial / Complete | Assessment or specialist recommendation |
| Roof, wall, and wet-area leaks are addressed | Not started / Partial / Complete | Repair records and test results |
| Water supply, sanitation, drainage, and rainwater routes are mapped | Not started / Partial / Complete | Service sketch and test records |
| Electrical, ventilation, and equipment loads are verified | Not started / Partial / Complete | Board, circuit, and service-point schedule |
| Approvals, access, and neighbour notifications are checked | Not started / Partial / Complete | Approval documents and access plan |
| Quantities, specifications, and assumptions are agreed | Not started / Partial / Complete | Scope of work and quantity take-off |
| Method, programme, safety, and protection measures are approved | Not started / Partial / Complete | Work plan and site protection plan |
| Acceptance criteria and variation procedures are established | Not started / Partial / Complete | Inspection forms and approval process |
Common mistakes to avoid
- Starting demolition before the structure and service routes have been identified.
- Freezing the design before actual dimensions, floor levels, and column positions are verified.
- Painting over or enclosing a leak without correcting its source.
- Ignoring protection, waste removal, temporary works, testing, and cleaning in the estimate.
- Using old drawings without marking changes or recording concealed conditions.
- Accepting work based only on appearance without checking function, maintenance access, and test results.
- Approving additional work verbally, making quantities, time, and cost difficult to trace.
Conclusion
A pre-renovation checklist is a decision-making and risk-control tool. A house that has been measured, inspected, and documented will produce a more defensible scope and quantity estimate. Resolve safety issues and active defects first, then confirm the design, method, budget, programme, and acceptance criteria before the contractor begins.
Frequently asked questions
Is a visual inspection enough for every renovation?
A visual inspection is useful as a first stage, but it is not always enough. Structural alterations, additional floors, serious damage, and concealed conditions require assessment by an appropriately competent professional.
When is a structural audit needed?
Consider a structural audit when the renovation adds load, changes openings, removes walls, adds a floor, expands the building, or reveals cracks and movement that cannot be explained.
Do all pipes and cables need to be replaced?
No. Existing services may be retained if their condition, capacity, access, and compatibility with the new design have been verified. Retained routes should be mapped and tested.
How should renovation work be prioritised?
Prioritise safety hazards, active defects such as leaks, structural problems, service failures, and work that will be concealed by later stages. Cosmetic work can follow after the underlying problems are controlled.
What should be documented before demolition?
Photograph every room, floor, wall, ceiling, opening, service point, meter, panel, external area, and retained item. Add measurements, locations, dates, and notes of pre-existing damage.
Who approves a variation?
The homeowner approves changes affecting scope, cost, time, or function. The contractor should explain the technical and quantity consequences, while the designer or specialist should review changes affecting design or safety.