
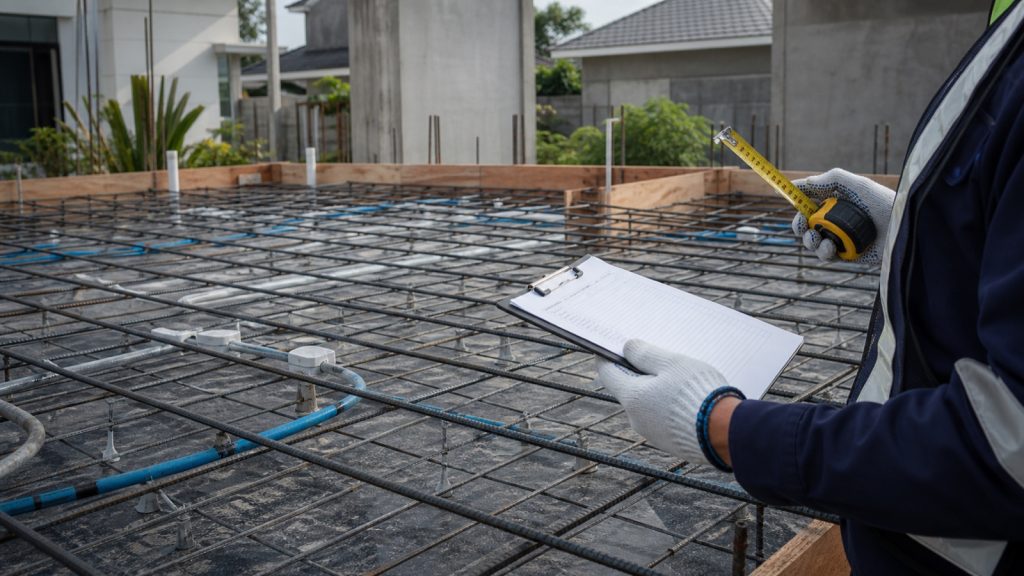
Casting a floor slab is one of the most decisive jobs in building a multi-storey house. Unlike other work that can still be dismantled and corrected, concrete that has been placed and hardened is very difficult and expensive to fix. For that reason, readiness before the pour must be confirmed thoroughly through a systematic set of checks.
For a more consistent and traceable pre-pour review, use the Concrete Structure QC Checklist (Enterprise Edition) – SNI 2847:2019 as a project QC aid.
This article provides a complete checklist of what to verify before, during and after casting a floor slab. The aim is to help you — as a homeowner, supervisor or site worker — make sure every technical aspect is ready, so the finished slab is strong, tidy and true to the design.
Why a Pre-Pour Checklist Matters
Pouring is one-directional and continuous: once the concrete is placed there is no second chance to fix missing reinforcement, leaking formwork or a forgotten service. A checklist makes sure no critical step is missed, reduces the risk of concrete defects, and keeps the quality in line with the drawings and specification. It is also a communication tool between the supervisor, the crew and the owner, so everyone works to the same standard.
1. Document and Planning Preparation
Before anything is prepared on site, make sure the reference documents are complete and understood. The latest working drawings, the concrete grade specification and the pouring method plan are the basis for all the checks that follow.
- The latest structural drawing of the floor slab is available and understood.
- The specified concrete grade is known and agreed.
- The concrete volume has been calculated, so the material need or ready-mix order is clear.
- The pouring method and access route (for the mixer or pump) are planned.
- The pour schedule has been communicated to everyone involved.
2. Formwork and Shoring Check
Formwork is the mould that determines the shape, thickness and flatness of the slab. The shoring beneath it must be able to carry the very heavy weight of wet concrete. A formwork failure during the pour is one of the most dangerous risks, so this part must be checked carefully.
- The formwork is fixed firmly, is tight, and has no gaps that could leak.
- The shoring is sufficient in number and strong enough to hold the wet concrete.
- The formwork surface is clean of dirt, sawdust and standing water.
- The base level of the formwork matches the plan so the slab thickness is uniform.
- The formwork has been coated with a release agent where required for easy stripping.
Bear in mind that even a slight deflection in the formwork can make the slab thickness uneven and increase the volume of concrete used. Recheck every formwork joint before moving on.
3. Reinforcement Check
Reinforcement is the backbone of the slab that resists tension. Its arrangement, diameter, spacing and cleanliness must match the drawing. Checking the reinforcement is one of the most important parts of this whole checklist.
- The diameter and spacing of the bars match the structural drawing, both ways.
- The bars are tied firmly at every crossing so they do not shift during the pour.
- The concrete cover is maintained with enough concrete spacers (chairs/decking blocks).
- The bars are clean of heavy rust, oil and mud that reduce bond.
- The development and lap lengths follow the drawing.
- The top (support) bars near the beams are not trodden down.
If the bars shift or the cover is lost, the strength and durability of the slab can drop. Make sure all the reinforcement is rechecked immediately before the pour, not long in advance.
4. Level and Slope Check
The slab surface level must match the plan so the thickness is correct and the finished floor is flat. For wet areas such as bathrooms and balconies, the fall towards the drain must be planned from the start.
- The concrete surface level (peil) is marked as a reference for the pour.
- The slope towards the floor drain in wet areas has been allowed for.
- The slab thickness is consistent with the drawing across the whole area.
5. Embedded Services Check
Mechanical and electrical services that must be embedded in the slab have to be installed before the pour. Forgetting them means breaking the concrete afterwards, which damages and weakens the slab.
- Plumbing pipes that pass through or are embedded in the slab are in place and temporarily plugged so no concrete enters.
- Electrical conduits and sparings are in position.
- Openings or sparings for other services (such as air-conditioning or downpipes) are provided.
- All embedded services are tied firmly so they do not shift during the pour.
6. Material, Tools and Quality Testing
The pour must run continuously without long interruptions, so materials and tools must be fully ready before it begins. The availability of a compactor and a plan for quality testing must also be confirmed.
- The concrete material (scheduled ready-mix or manual mix ingredients) is available in sufficient quantity.
- A concrete vibrator is available and working, so the concrete is not left honeycombed.
- A plan for taking test specimens and slump tests is in place where required.
- Support tools such as the chute, buckets and levelling tools are ready on site.
7. Workforce and Weather Readiness
Casting a slab needs enough well-coordinated labour, because it must be finished in one stage. The weather also determines the success of the work.
- The number of workers is enough to finish the pour in one session.
- Roles are clearly divided: placing, levelling, compacting and supervising.
- The weather forecast is checked; avoid pouring in heavy rain.
- Covers or tarpaulins are ready in case of sudden rain.
8. During the Pour
Once pouring begins, supervision must not relax. The following keep the result dense and free of defects.
- Concrete is placed continuously to avoid a cold joint.
- Concrete is compacted evenly with the vibrator, but not excessively.
- The surface is levelled to the marked level.
- Test specimens are taken as planned to verify the grade later.
9. After the Pour: Curing
The work is not finished once the concrete is placed. Curing keeps the concrete moist so it reaches its design strength. Poor curing causes hairline cracking and a concrete that never reaches the intended grade.
- The concrete surface is kept moist for several days, commonly at least about seven days as usual practice.
- Curing is done by sprinkling, ponding, or covering with wet hessian.
- The slab is not overloaded before the concrete is old enough.
- The formwork and shoring are not removed before their proper time as advised by the site engineer.
Fatal Mistakes to Avoid
- Starting the pour while the reinforcement or services are still incomplete.
- Neglecting compaction, so the concrete is honeycombed and the bars are unprotected.
- Allowing a cold joint from an interruption that is too long.
- Skipping curing, so cracks appear and the grade is not reached.
- Removing the shoring too early, before the concrete has gained enough strength.
Understanding Wet Concrete Behaviour
Every step in this checklist is rooted in one fact: wet concrete is a heavy, flowing material that changes over time. The weight of wet concrete on a floor slab is very large, which is why the formwork and shoring must be truly solid. Concrete also flows into every gap, so leaking formwork leads to lost material and a honeycombed surface. And concrete begins to set within hours, so the pour must be planned to finish before the concrete loses its workability.
Understanding this behaviour makes each check meaningful rather than a mere formality. Solid formwork prevents failure, compaction drives out trapped air, and curing keeps the water the concrete needs to reach strength. This understanding sharpens your supervision because you know the reason behind every step.
Coordination Between Parties
Casting a slab involves several parties at once: the structural crew, the steel fixers, the plumbers and electricians, the concrete supplier and the supervisor. One party being ready means nothing if another is not, so coordination is the key. Before the day of the pour, it is best to hold a joint check to confirm the reinforcement, services and formwork are complete and approved.
A short pre-pour meeting also clarifies each person’s role during the work — who directs the placing, who compacts, and who checks quality. Good coordination lets the pour run smoothly, without the kind of panic that lowers quality.
Documentation and Stage Approval
Each stage of checking should be documented, whether by photographs or a signed checklist. This is not mere paperwork; it is evidence that the work met the standard before the concrete covered it. Should a problem arise later, the documentation helps trace the cause. A photograph of the reinforcement before the pour, for instance, is the only record of the bar positions that are no longer visible once cast.
Stage approval before the pour, especially for the reinforcement, is a strongly recommended practice. By having the supervisor or a competent person approve the work before the concrete is placed, you ensure no critical step is missed and responsibility for quality is clear.
Linking the Checklist to Volume and Budget
This checklist also bears directly on cost control. Flat formwork and correct levels ensure the slab thickness matches the plan, so the concrete used does not exceed the calculation. Conversely, formwork that deflects or a level that is not maintained can quietly increase concrete use. Discipline in following the checklist is therefore about efficiency as well as quality. Before pouring, make sure the concrete volume has been calculated correctly so the order is exactly right.
Choosing the Pour Method: Manual or Ready-Mix
An important decision before casting a slab is whether to use a manual on-site mix or ready-mix concrete from a supplier. For a floor slab of reasonable volume, ready-mix is generally preferred because its grade is more uniform and the pour can proceed quickly and continuously, reducing the risk of cold joints. Ready-mix does require adequate access for the mixer truck or concrete pump to reach the site.
A manual mix remains an option for small volumes or sites that large vehicles cannot reach. The trade-off is that grade uniformity depends heavily on disciplined batching and mixing and on the speed of the crew. Whichever method is chosen, readiness against the checklist matters just as much; only the way the concrete is supplied differs. Consider volume, site access, target grade and available labour when deciding. In the end, a successful slab pour is not the result of any single step but of the discipline to check every aspect from planning through to curing.
Frequently Asked Questions
Why must a slab be poured continuously?
Continuous pouring prevents a cold joint — the boundary between old and new concrete that does not bond perfectly. A cold joint can become a weak point and a path for water, so the slab should be cast in one go without a long interruption.
What is the purpose of concrete spacers (decking blocks)?
Concrete spacers keep the gap between the reinforcement and the formwork surface, so the concrete cover is formed as designed. The cover protects the bars from rust and fire and keeps them in the correct working position.
How long should concrete be cured after the pour?
As usual practice, the surface is kept moist for several days, commonly at least about seven days. The exact curing period should follow the project specification and local weather conditions.
What happens if compaction is poor?
Poor compaction leaves the concrete honeycombed (with voids), so its strength drops and the bars are not well protected. Even compaction with a vibrator helps release trapped air and consolidate the concrete.
Can a slab be poured in the rain?
It is best avoided. Excess rainwater can change the water content of the mix and reduce its grade. If rain arrives suddenly during the pour, the concrete surface should be protected with a cover so it is not directly exposed to water.