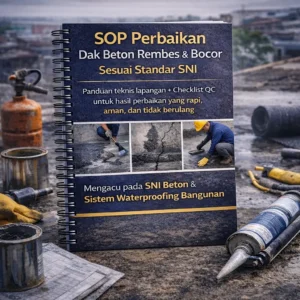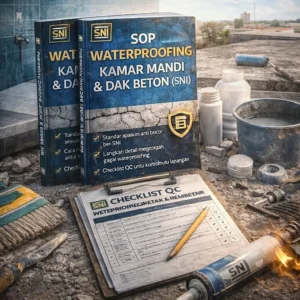
Waterproofing a bathroom or concrete roof deck is not simply a matter of applying a water-resistant product. Performance depends on correct detailing, substrate condition, work sequence, joint and penetration treatment, protection after installation, and documented testing. This SOP provides a field-ready framework for new work and repairs associated with dampness or leakage. Project documents, approved specifications and drawings, manufacturer instructions, applicable SNI and local regulations, and approved method statements remain the governing references whenever they impose more stringent requirements.
1. Purpose and scope
The purpose of this SOP is to ensure that bathroom and concrete roof-deck surfaces are protected against water ingress, critical details are treated consistently, concealed work is inspected before covering, and the completed system is supported by traceable evidence. The scope covers initial inspection, substrate preparation, concrete repairs, formation of falls, floor drains and pipe penetrations, primers and base coats, sheet membranes or coatings, curing, flood or approved alternative testing, protection, finishes, quantity measurement, and handover.
This SOP does not replace structural design, drainage design, a project-specific waterproofing specification, or an approved repair design. Active cracks, deep honeycombing, reinforcement corrosion, excessive deflection, and pressurized water ingress must be assessed by a competent party before waterproofing proceeds.
2. Definitions and system principles
- Waterproofing: the combined system of layers, membranes, sealants, joint treatments, terminations, and protection that limits water penetration into the building.
- Substrate: the concrete, screed, mortar, board, or other surface receiving the waterproofing system.
- Critical detail: a floor-to-wall corner, floor drain, pipe penetration, construction or movement joint, crack, upstand, parapet, or interface between materials.
- Flood test: a controlled test in which water is retained over a waterproofed area to check for leakage for the period defined by the specification or approved method.
- Hold point: a stage that may not proceed or be covered until inspection and release by the authorized party.
- NCR: a nonconformance report recording a departure from the drawing, specification, method, or acceptance criteria.
The central principle is to control water at its source: surfaces must fall toward drainage, penetrations must be securely integrated and sealed, the waterproofing layer must be continuous, and completed work must be protected from puncture and uncontrolled traffic.
3. References, required inputs, and approvals
Before starting, the team shall collect architectural, structural, and plumbing drawings; waterproofing details; project specifications; the approved method statement; product technical and safety data sheets; an approved mock-up where required; and the Inspection and Test Plan. Use the SNI standards listed in the contract or project regulatory register, applicable occupational safety regulations, and the manufacturer’s written instructions. Do not combine products from different systems without technical approval.
- Verify product identity, batch number, shelf life, packaging condition, and technical documentation.
- Confirm that shop drawings show elevations, falls, upstands, drains, joints, penetrations, and termination details.
- Coordinate the sequence with plumbing, screed, tiling, mechanical services, and roof works.
- Submit materials, method, mock-up, and ITP for approval before mobilization.
- The quantity surveyor or cost controller shall agree the measurement basis: field area, linear details, number of penetrations, contract-allowed waste, and separately approved repair work.
4. Roles and competency
| Role | Primary responsibility |
|---|---|
| Project manager | Provides resources, coordination, work sequencing, and required approvals. |
| Waterproofing supervisor | Directs application, checks substrate, controls weather, batches, tools, and workmanship. |
| QA/QC inspector | Verifies hold points, records inspections and tests, and controls NCR closure. |
| Applicators and operatives | Follow the TDS and SDS, apply the system correctly, keep the area clean, and report abnormal conditions. |
| Plumbing and finishing coordinators | Ensure that drains, sleeves, pipes, screeds, tiles, and protection do not damage the system. |
| Quantity surveyor | Checks take-off, scope boundaries, measured progress, installed materials, and approved remedial work. |
Applicators must be experienced with the selected system and briefed on mixing ratios, working time, intercoat intervals, thickness, joint details, and weather limitations. Supervisors must not accept work merely because its color is uniform or its surface appears glossy.
5. Work sequence
5.1 Initial inspection and condition mapping
- Set out and barricade the work area, verify access, and compare actual conditions with the drawings.
- Inspect cracks, tie-rod holes, honeycombing, laitance, oil contamination, dust, standing water, damaged edges, pipe penetrations, drains, joints, and damp spots.
- For repairs, map the source and path of water. The visible stain is not necessarily the point of entry.
- Measure and record falls toward drains. Identify low spots that can retain water.
- Photograph the area before work, mark a grid or location references, and create a defect list.
5.2 Substrate preparation and repairs
Remove dust, oil, curing compounds, laitance, paint, and loose material using a method that will not damage the concrete. The surface must be sound, clean, within the dry or damp condition permitted by the system, and free from running water. Repair honeycombing, holes, and nonstructural cracks with compatible materials. Moving cracks and joints require flexible detailing in accordance with the design; they must not simply be filled with rigid mortar.
Form a fillet or cove at floor-to-wall corners where required by the system. Ensure that drains are securely fixed, have the required flange or clamping detail, and are not higher than the finished surface. Temporarily protect openings so material cannot enter the pipe. Vacuum, sweep, or otherwise clean the surface by the approved method before primer application.
5.3 Falls and drainage details
Falls must direct water to the drain without creating depressions. The required fall follows the drawings and specification and must be verified with suitable measuring equipment rather than visual judgment. A sloping screed must be sufficiently cured, stable, and crack-free before coating. On roof decks, inspect parapets, overflows, scuppers, roof drains, and emergency drainage paths. In bathrooms, inspect floor drains, shower areas, thresholds, and pipe penetrations.
5.4 Primer, base coat, and reinforcement
Mix and apply primer in accordance with the TDS. Do not add thinner, water, or other materials unless the manufacturer expressly permits it. Use the specified roller, brush, squeegee, or other tool. At corners, joints, cracks, and penetrations, install reinforcing tape, mesh, collars, or compatible sealant as shown in the system detail. Reinforcement must be fully embedded, without wrinkles, voids, or exposed open ends.
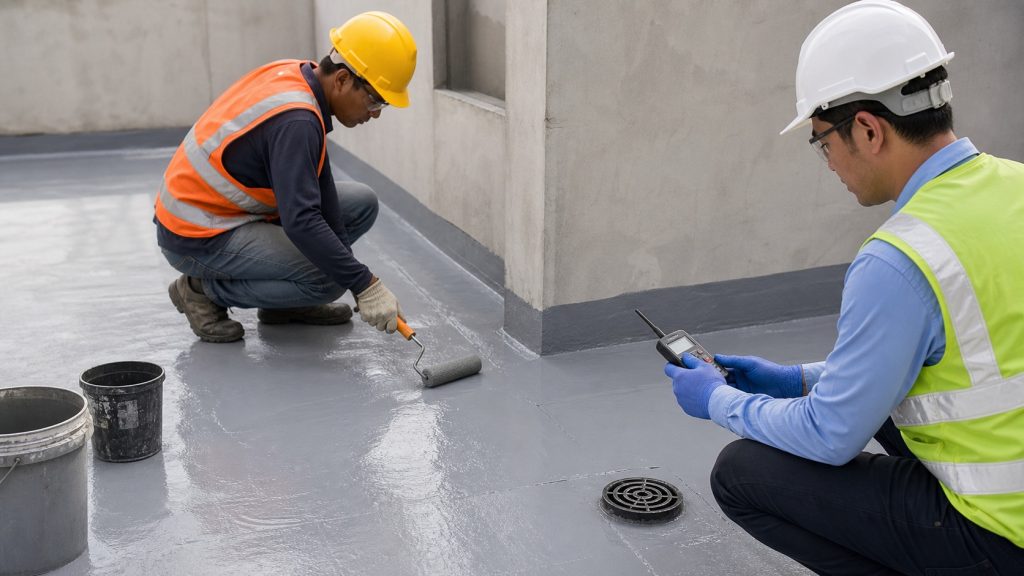
5.5 Membrane or coating application
- Check temperature, humidity, wind, rain risk, and substrate condition against the TDS limits.
- Mix components with the specified equipment and for the specified time. Record batch, mixing time, and pot life.
- Apply the first coat at the specified thickness and in the required direction. Avoid pinholes, sagging, excessive roller marks, and missed areas.
- When the recoat interval has been reached, apply subsequent coats in the cross direction where required.
- Carry the system up walls, parapets, or upstands in accordance with the approved detail. Provide mechanical restraint or sealant at terminations where required.
- Protect the membrane from rain, standing water, dust, traffic, and other trades until curing is complete.
For sheet membranes, inspect alignment, side and end laps, corner details, penetrations, and the specified heating or adhesive method. Do not puncture the membrane with nails or place sharp objects on it. For cementitious systems, control the water ratio and curing. For liquid-applied systems, control wet-film or dry-film thickness with suitable gauges and inspect representative areas.
5.6 Protection and finishes
After the system passes inspection, install the approved protection board, protective screed, geotextile, tile bedding, or other protection. Protection must not shift, scratch, or conceal defects that remain unresolved. Coordinate all final penetrations before the waterproofing is covered. Screed, tile, ballast, and other subsequent work must use methods that prevent damage to the waterproof layer.
6. Inspection hold points and acceptance criteria
| Stage | Hold point and evidence | Acceptance criterion |
|---|---|---|
| Substrate | Checklist, photographs, fall measurement | Sound and clean, with no loose material, critical depressions, or running water; falls comply with the drawings. |
| Details | Inspection of drains, joints, corners, and penetrations | Details are continuous, secure, sealed, and consistent with the approved shop drawing. |
| Application | Batch, weather, thickness, and area records | Coverage and thickness comply with the TDS; no pinholes, blisters, delamination, wrinkles, or missed areas. |
| Pre-cover | QA/QC release and detail photographs | All defects are repaired; no following trade covers the system without authorization. |
| Testing | Water level, start and finish time, and inspection of the space below | No leakage, dampness, unexplained level loss, or system damage during the specified test period. |
| Handover | As-built information, checklist, and material records | Area is clean and protected, drains operate, and all punch-list items are closed. |
Conduct a flood test only after the system has reached the required cure and the area is safe to retain water. Water height, duration, and isolation method shall follow the specification or approved project method; a 24- to 48-hour period may be used only when it is defined as a project requirement. Inspect the space below, the reverse side of walls, ceilings, and areas around penetrations. If flooding is impractical, use an approved alternative such as controlled hose testing of selected details, visual monitoring, or a test appropriate to the membrane system.
7. Safety and environmental controls
- Conduct a toolbox talk and job safety analysis, and verify permits before work starts.
- Use PPE required by the SDS, including gloves, eye protection, work clothing, safety footwear, and respiratory protection where necessary.
- Provide ventilation for solvent-containing products or enclosed bathrooms; control ignition sources and sparks.
- Use safe access, guardrails, lifelines, and fall protection on roof decks. Do not work at unprotected edges.
- Manage cables, hoses, drums, and test water to prevent trips. Check the structural capacity for retained water before flooding.
- Store products according to the SDS, prevent spills entering drains, and dispose of packaging and residue under the project environmental procedure.
8. Measurement, quality records, and NCR control
Measure quantities from installed and accepted work in accordance with the contract unit. Separate main areas, upstands, linear details, penetrations, protection layers, and approved repair work. Do not certify an area that has merely been coated but has not passed inspection or testing. Minimum records include date, location, substrate, product and batch, applicators, weather, area, material consumption, thickness, inspection results, test results, photographs before and after, and approvals.
If pinholes, blisters, delamination, leakage, insufficient thickness, missed details, or expired material are found, issue an NCR. Isolate the area, identify the cause, submit a repair method, and obtain approval before rework. Repeat the relevant inspection and testing after repair. An NCR must not be closed with photographs alone; the result of the corrective work must be evidenced.
9. Practical examples and key risks
In a bathroom, leakage commonly occurs where the membrane stops around the floor drain, a shower pipe has no collar, or the screed covers the detail before inspection. The correct response is to verify the drain position, reinforce every penetration, extend the waterproofing to the required vertical areas, and complete the flood test before tiling.
On a concrete roof deck, ponding may remain even when the coating has no visible hole. Causes can include incorrect falls, blocked drains, poorly detailed parapets, active cracking, or trapped moisture. Corrective work must address the source rather than simply adding a local coat over the stain. Other risks include puncture by following trades, application to excessively wet concrete, inadequate thickness, delamination, and incompatibility between adjacent products.
10. Handover checklist
- Latest drawings and details match the installed condition.
- Substrate, detail, application, and pre-cover checklists are signed.
- Batch numbers, TDS, SDS, and storage records are filed.
- Thickness or coverage measurements are available where required.
- Flood or approved alternative test has passed and the area below has been inspected.
- All NCRs and punch-list items are closed.
- Drains, overflows, and discharge paths are clean and functional.
- Protection is complete and maintenance guidance has been issued to the owner.
- Photographs, as-built information, valid product documents, and the handover record are available.
11. Conclusion
Reliable waterproofing is achieved through correct detailing, a prepared substrate, controlled application, testing before concealment, and protection during subsequent work. Establishing hold points, acceptance criteria, quantity records, and an NCR process at the outset reduces rework and makes future leakage investigation more manageable. This SOP should be read together with the approved project documents and the selected manufacturer’s system requirements.
12. FAQs
Can waterproofing be installed over concrete that is still wet?
Only when the system expressly permits that condition. Follow the moisture and surface limits in the TDS. Running water, standing water, and unstable concrete must be addressed first.
Must every bathroom receive a flood test?
A flood test or approved alternative should normally be completed before covering the system. The final requirement depends on the specification, area risk, and approval of the supervising party.
How high should waterproofing extend up the wall?
The required upstand follows the project detail and selected system. Do not rely on a generic dimension where the drawings or manufacturer specify another value; ensure that wet areas, corners, and penetrations are fully covered.
Why can a roof deck still leak after coating?
Possible causes include active cracks, drain or parapet details, trapped moisture, insufficient thickness, delamination, or damage after application. Map and inspect the whole system instead of applying another local coat only at the stain.
When may waterproofing be covered?
Only after the TDS curing period, approved pre-cover inspection, proper repair of all defects, and completion of the required test.